How to Render a Drawing: From Sketch to Final Image
Learn how to render a drawing step by step: prepare the source, choose a style, check geometry and refine the final image for review or presentation.
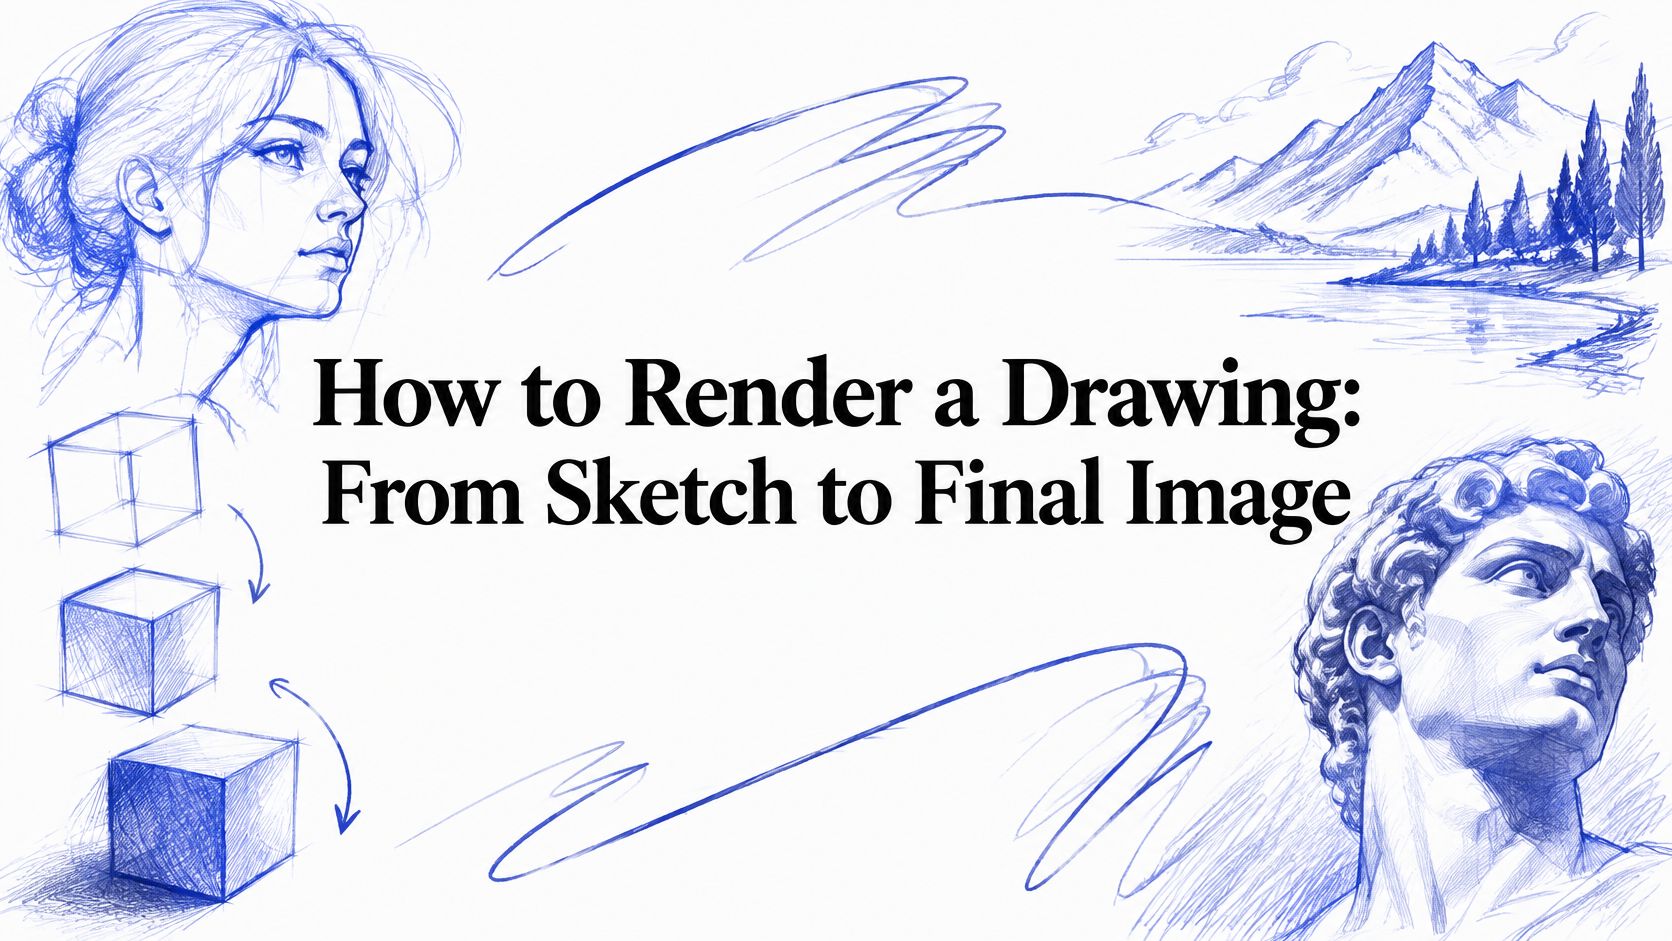
The usual advice on how to render a drawing starts too late: choose beautiful materials, add dramatic lighting, then push for photorealism. That's a poor starting point if the image hasn't preserved the building you drew. A convincing reflection won't compensate for a misplaced entrance or a roofline that changed during generation.
Start with what the viewer needs to verify. Then prepare the drawing, control the viewpoint, generate a draft, and check the architecture before polishing the image. Realism is a presentation choice. Geometric fidelity is a requirement.
Choose the Render Level Before You Start
Spending hours on photorealism for a review that only needs a massing comparison is wasted effort. The useful render level depends on who will judge the image and what they must be certain about afterward.
Slow output is a practical constraint: 43% of surveyed architecture and design firms identified slow rendering times as a major visualization challenge, according to the Chaos state of architectural visualization report, which also highlights demand for real-time rendering to support faster design decisions. That makes choosing the right output more important than maximizing every setting.
Match the image to the decision
Render levels and what each one must preserve
| Render level | Best for | Keep fixed | Safe to vary | Typical effort |
|---|---|---|---|---|
| Fast conceptual render | Early massing and option comparison | Massing, scale, camera framing | Materials, planting, atmosphere | One pass at low detail |
| Real-time view | Design reviews with the team | Geometry, openings, circulation, views | Lighting mood, furniture, colour | Interactive, updates as the model changes |
| Client-approval image | Material and lighting decisions | Geometry, materials, scale, openings | Furniture, people, season | Several passes with region edits |
| Final presentation image | Marketing visuals and print | Everything verified in earlier passes | Grading, framing polish | Maximum sampling, upscale and touch-up |
These freedoms aren't permissions to redesign accidentally. Planting can change only if it isn't part of the decision being reviewed. Furniture can move only if it doesn't conceal a circulation problem. Structural elements stay fixed unless the team is explicitly comparing structural options.
For early reviews, neutral surfaces and clear shadows often communicate more than rich textures. A polished image can make an unresolved façade look approved, particularly when viewers concentrate on the atmosphere rather than the junctions.
Decision rule: Write down the question the image must answer, then choose the least elaborate render level that answers it reliably.
For example, “Does the entrance read clearly from the street?” needs a controlled street view, not elaborate interior staging. “Do these finishes work under evening lighting?” needs credible material response and illumination.
Budget revision time as well as generation time. Use the guide to calculating render time when planning the work, and leave room for checking and corrections rather than treating the first finished-looking image as the deliverable.
Writing the Brief and Reference Images
A useful brief separates architectural constraints from visual choices. Start by identifying walls, doors, windows and other components, then clarify ambiguous linework before asking a generator to interpret materials or mood.
Use this preparation sequence to keep drawing interpretation separate from image styling.
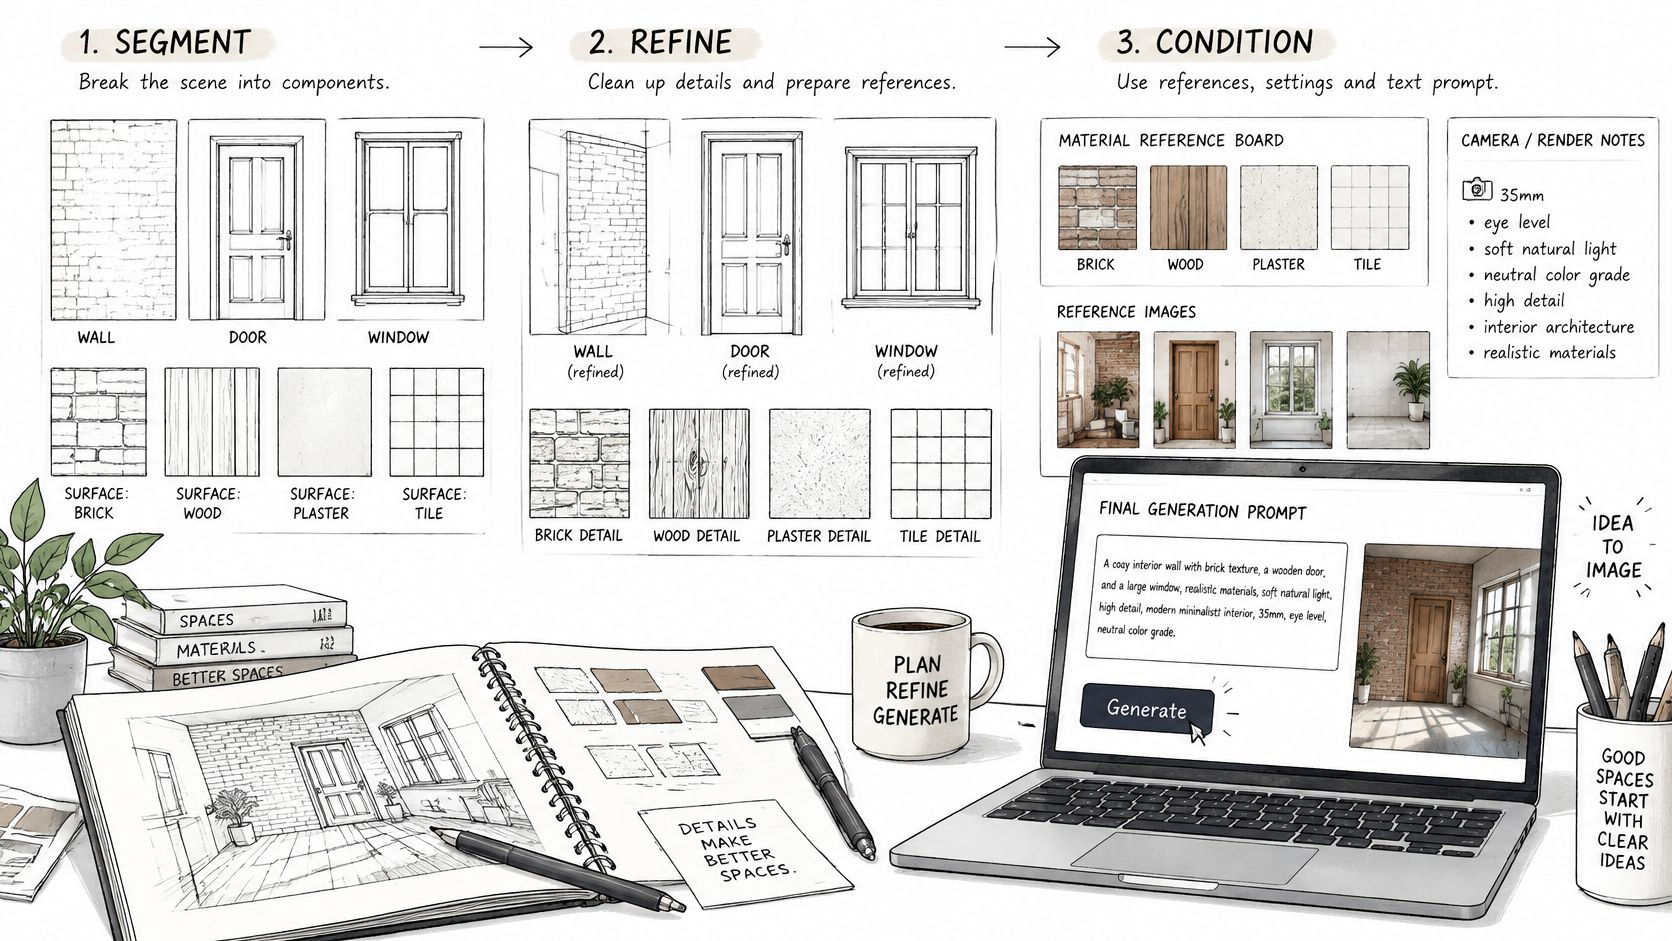
A study of sketch-to-architectural-image generation used a staged component-refinement workflow; 70 architecture and design graduate students rated overall image quality 3.93/5, sketch alignment 4.03/5, and architectural-detail accuracy 3.97/5. Those separate ratings matter: an attractive output and an accurate interpretation aren't the same judgment.
Write decisions, not adjectives
For a hypothetical library, a usable brief would read:
Render the supplied library perspective with vertical timber cladding, a pale concrete base and clear glazing. Preserve the roof profile, entrance position and window divisions. Show dusk with soft blue ambient light and warm light from the reading rooms. Keep the camera at the supplied standing-eye-level viewpoint, with a quiet, welcoming atmosphere and sparse planting that leaves the entrance visible.
Each sentence has a job. The material description assigns surfaces, the preservation instruction identifies constraints, and the lighting description names visible light sources. The final sentence controls viewpoint and staging without asking for a different building.
Avoid adjective stacks such as luxurious, cinematic, stunning and ultra-realistic. They don't resolve whether the timber is vertical, where the light comes from or which opening must remain untouched.
Give references a limited role
Label each reference by its intended influence:
- Material: Timber grain, concrete finish or metal sheen, not building shape.
- Atmosphere: Weather and lighting character, not window placement.
- Colour: Palette relationships, not surface substitutions.
- Geometry: A specific architectural arrangement that the design allows.
If you need to distinguish image-based visualization from conventional scene rendering, the explanation of photo rendering helps clarify the workflow choice.
Watch the demonstration with those reference roles in mind.
A material reference shouldn't become a replacement façade. Keep the written brief short enough that you can identify which instruction caused a result and revise that instruction deliberately.
How to Render a Drawing Step by Step
Prepare a working copy rather than altering the source document. Keep the drawing, generation input and rendered output distinguishable so you can compare them without wondering which file contains the approved design.
The preparation flow below concentrates on the work that makes later edits predictable.
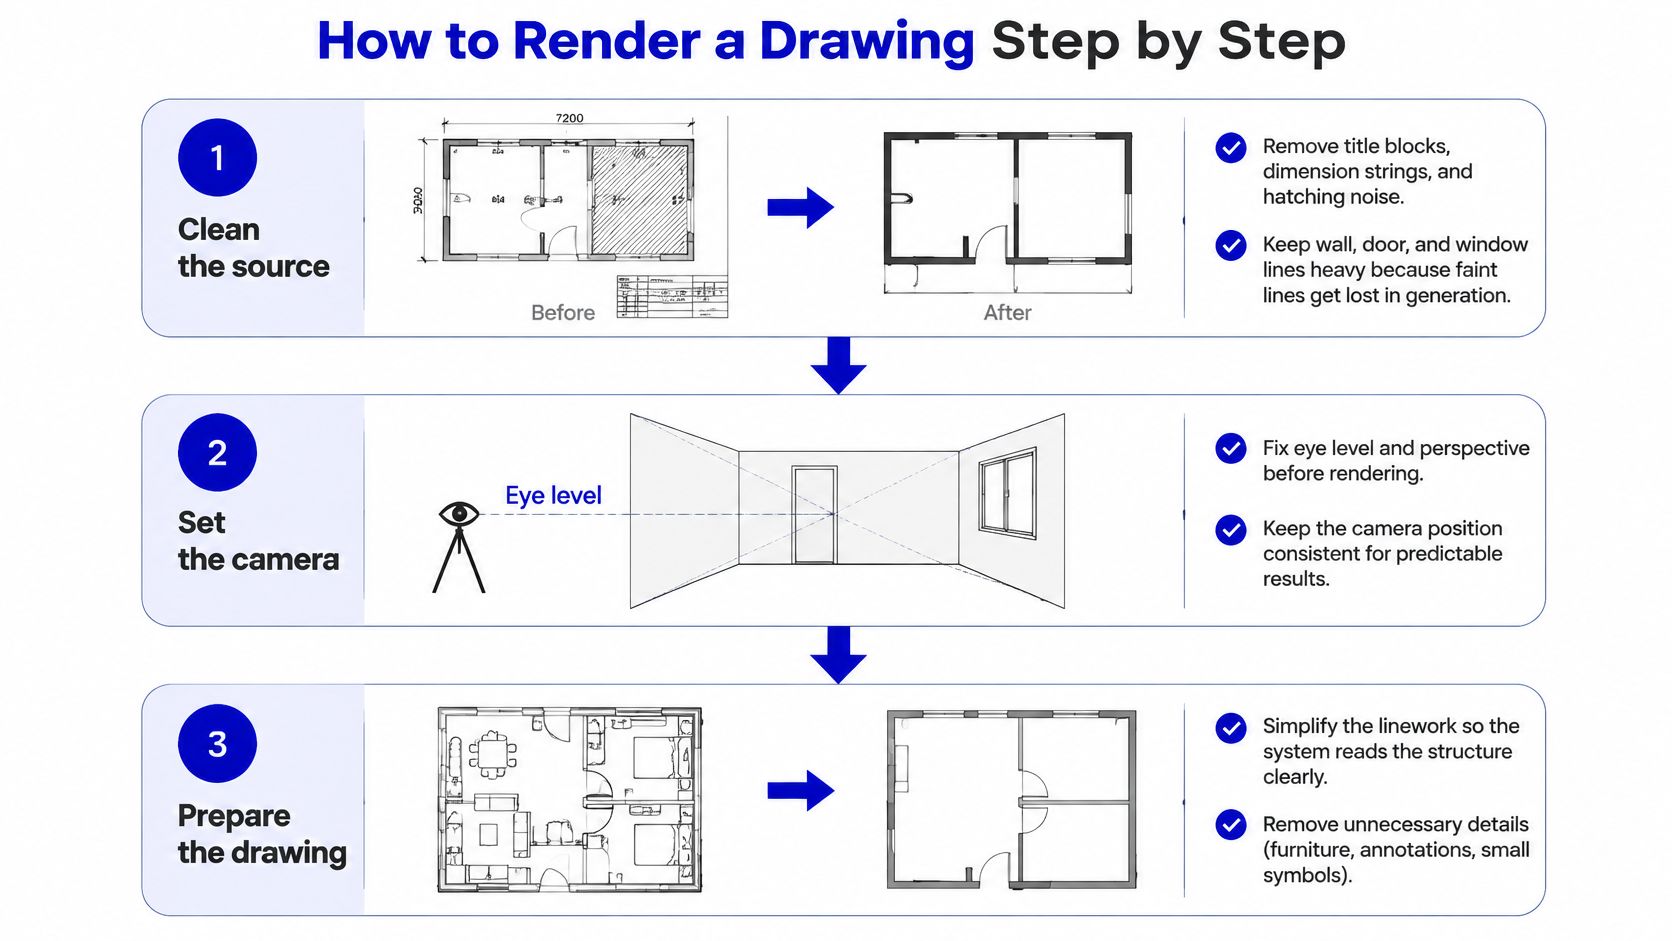
Prepare the input
Clean the source. Remove title blocks, dimension strings, construction guides and dense hatching from the rendering copy, while retaining context that explains the building. Strengthen wall boundaries, door openings and window frames selectively; making every line equally heavy can turn glazing into an apparently solid wall.
Set the camera before adding detail. Choose a standing-eye-level viewpoint for a pedestrian view, or deliberately label a raised view, then check the horizon and convergence of receding edges. Projection from a fixed viewpoint is fundamental to credible spatial depiction, as the MIT account of architectural perspective explains; don't use a wider view merely to disguise an awkward room proportion.
Prepare components for interpretation. Separate walls, doors, windows, roof planes and ground surfaces into layers or masks where your workflow supports them. Close accidental gaps and distinguish glazing from blank panels, because an ambiguous source leaves the generator to invent an answer.
Attach the brief to the view. Name the material assignments, time of day, light sources and atmosphere in plain sentences, keeping references tied to their intended roles. If you're choosing between a model-based workflow and image-based generation, compare the setup requirements in the free 3D rendering software guide before rebuilding a scene unnecessarily.
Generate and refine deliberately
Make a draft at the chosen render level. For an image-based workflow, upload the view and describe what it shows and how it should read rather than setting up materials, lights and a render engine. Keep the rough draft even if its textures are weak, because it gives you a baseline for deciding whether the interpretation is usable.
Correct a selected region instead of restarting everything. Mask the surface or object that needs attention, leaving checked boundaries outside the selection wherever possible. In our Studio workspace, reference images can have separate roles, and you can refine an area, extend the frame and upscale for print; export options include PNG, a project zip, DXF or DWG for the drawing set, or a clip.
Run the review gate before delivery. Approve the architecture before accepting the finish, then save a lossless master and create presentation-sized copies from that approved file. Choose the export for its next use, and don't mistake a drawing-format export for confirmation that generated visual detail is technically coordinated.
Pilot the routine on a single project view. Choose a view with readable openings and representative materials, then record the input, instructions, edits and approval outcome. Your test should produce a checked image and a repeatable procedure, not merely a collection of attractive alternatives.
Keep the last approved draft beside the current edit. A local improvement isn't useful if you lose a previously correct entrance, roof edge or structural bay.
A ready render has the openings the drawing specifies, believable scale relationships and materials consistent with the brief. If you can't explain why an important feature changed, the image isn't ready for approval, however convincing its lighting looks.
Check the Render and Fix Common Failures
Review the image in three passes. Start with massing and perspective, continue with openings and circulation-defining elements, then inspect surface appearance and polish. Don't let realistic textures influence whether you accept the architecture.
Use the checklist as a review gate rather than a final glance.
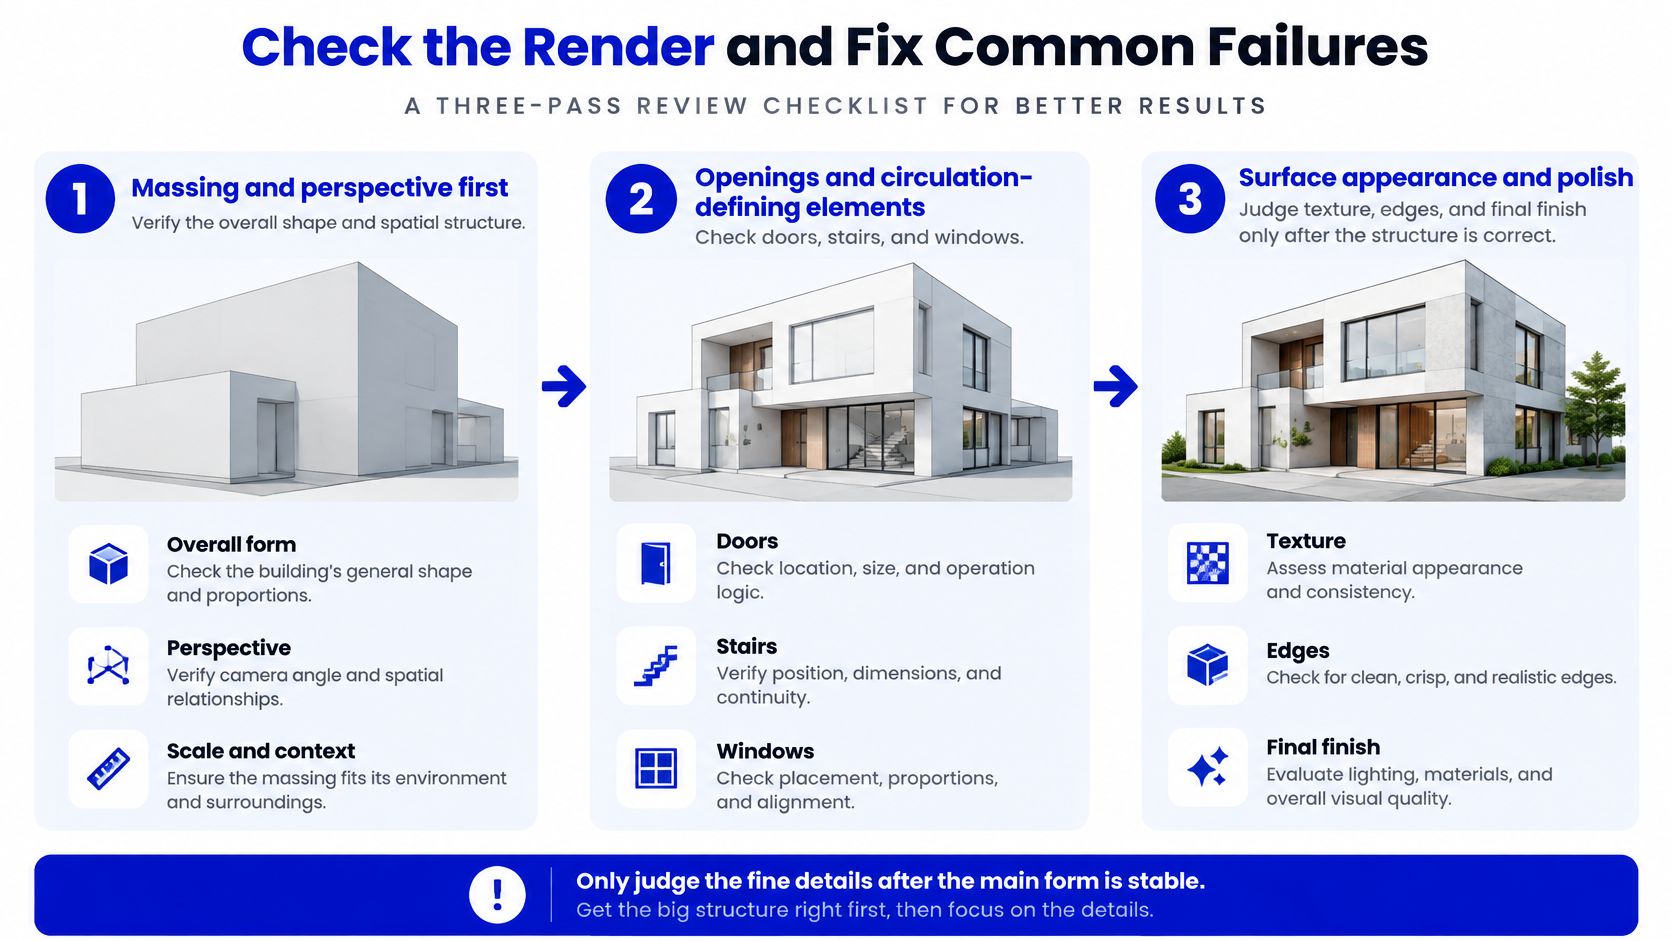
For massing, compare the silhouette, floor relationships, roof pitches and major setbacks. For openings, check door positions, stair connections, window divisions and routes through the space. Use a transparency overlay when the source and output share the same framing; compare side by side when they don't.
Diagnose the visible fault
Aliasing, exposure problems, blur and texture loss need different corrections. The computer-generated image quality study by Čadík and colleagues identifies these graphics-specific distortions and finds that conventional quality metrics correlate poorly with human judgment, with no tested metric consistently superior across cases.
Render symptoms, causes and fixes
| Symptom | Likely cause | Fix |
|---|---|---|
| Stair-stepped edges on walls and roof lines | Insufficient supersampling or missing pre-filtering | Raise anti-aliasing and re-render the affected region |
| Clipped highlights or lost interior detail | Incorrect exposure | Retune exposure so interior and exterior both keep detail |
| Soft, blurred linework or edges | Low rendering accuracy | Increase sampling and inspect at native image scale |
| Smeared or flat material surfaces | Texture loss from limited computing resources | Draft at lower resolution, re-render the final at full settings |
| Doors or windows in the wrong place | Geometry drifted during generation | Re-check camera against the source and overlay the original drawing |
The table gives starting diagnoses, not interchangeable remedies. Increasing sampling won't move a window back into position, and changing exposure won't recover a missing mullion. In a model-based renderer, adjust sampling and anti-aliasing directly; in an image-generation workflow, use targeted regeneration or return to a clearer input when those controls aren't available.
Inspect at delivery scale
Examine high-contrast roof edges, railings and thin window frames at native pixel scale, not only in a fit-to-screen preview. Then balance exposure so the façade highlights and occupied interior remain legible. Check timber grain, paving joints and cladding seams for continuity across edited regions.
Approval test: Can another reviewer identify the same building, openings and material assignments without relying on your explanation?
Use a human checklist covering edge stair-stepping, clipped highlights, shadow readability, texture continuity and geometry fidelity. An automated score can supplement that inspection, but it shouldn't decide whether the image accurately communicates the design.
Finally, inspect the actual presentation derivative. Resizing can soften linework, while aggressive sharpening can create halos around rooflines. Keep the lossless master untouched and correct the derivative separately when the export process introduces the fault.
Keep a Traceable Record for Handoff
A faster image creates downstream risk when nobody can reproduce or audit its changes. Traceability is part of the deliverable, especially when a presentation image will influence later modeling or coordination.
The RIBA AI Report 2025 identifies interoperability, infrastructure, training, digital literacy and confidence among experienced designers as continuing implementation barriers. A clear handoff record addresses the practical question behind those concerns: what can the next person safely rely on?
Package the decisions with the image
Keep a compact handoff packet:
- Original drawing: Preserve the unchanged source and identify its revision.
- Prompt log: Record generation instructions and subsequent regional edits.
- Reference list: Save each image with its assigned influence.
- Geometry check: Record what was compared, corrected and approved.
- Final master: Include the approved lossless image and identify presentation derivatives.
Label invented furniture, planting, people and vehicles as illustrative. Separate a conceptual mood image from evidence intended for planning, technical coordination or construction, and verify relevant information against the model before changing its use.
Say a client asks to move a window. The record should show which output changed, which instruction or reference prompted the revision, and which opening check was repeated. Without that record, someone may model an accidental generated change as an approved design decision.
Choose handoff formats for the next CAD, BIM or visualization task. A rendered image communicates appearance; it doesn't establish editable building geometry, construction dimensions or coordinated specifications merely because it looks precise.
mnml.ai turns sketches and model views into rendered visualizations, with selected-area editing and tools for comparing alternatives beside their sources. Visit mnml.ai to test a project view, keep its instructions with the result, and build a checked rendering workflow before applying it to a full presentation set.