
Living Room Staging: How to Arrange, Light and Style
Step-by-step living room staging: set furniture clearances, place seating, layer lighting and balance visual weight, with measurements and a checklist.
You're standing in the doorway, coffee in hand, wondering why the living room looks fine in pieces but wrong as a whole. The sofa is decent. The rug was not cheap. Yet you squeeze sideways past the coffee table, one chair never gets used, and the room still reads as a corridor with furniture parked along the walls.
That's rarely a taste problem. It's usually an order problem. Good living room staging sets clearances first, picks one believable way the room will be lived in, and only then places furniture, styling and light around that decision. Work in that order and you stop decorating around mistakes.
Measure the Room and Set Clearances First
The living room carries more weight than any other room. In the National Association of REALTORS 2025 Profile of Home Staging, 37% of buyers' agents said the living room was the most important room to stage, ahead of the primary bedroom and kitchen. It was also staged in 91% of transactions where agents staged homes.
Most failed staging is a clearance problem, not a style problem. Buyers feel a blocked path before they register a cushion colour. Check these numbers on paper before you move anything.
Living room clearances and reference measurements
| Element | Target measurement | Why it matters |
|---|---|---|
| Walkway between large pieces | 75 to 90 cm (30 to 36 in) | Keeps the path to windows and doors clear |
| Sofa to coffee table | 40 to 45 cm (16 to 18 in) | Reachable without leaning or stretching |
| Sofa to TV for a 55-inch screen | About 2.1 m (7 ft) | Sits within the comfortable viewing range |
| Conversation distance between seating groups | 1.1 to 3.0 m (3.5 to 10 ft) | Supports talking without raised voices |
| Side table to sofa arm | 0 to 5 cm (0 to 2 in) | Keeps drinks and lamps within arm reach |
| Coffee table height against sofa seat | Level with or up to 5 cm (2 in) below the seat | Keeps the table visually calm and easy to use |
How to Measure So the Numbers Hold
Measure with a tape from fixed walls, not from the furniture you already own. Your current sofa may be the wrong size, and measuring from it bakes that error into every decision. Note wall to wall length and width, skirting to skirting if you want the usable figure.
Sketch the room on graph paper at 1:20 or trace the floor plan. Mark doors, windows, outlets, radiators and the swing of each door. A door swing forgotten on paper becomes a chair nobody can pull out in real life.
Don't buy, borrow or move a single piece until the main walkway survives on the sketch.
You should end with two things in hand. A scale sketch that shows every opening and fixed obstacle, and a short list of clearance numbers you'll test against every layout that follows.
Choose a Living Scenario Before Placing Furniture
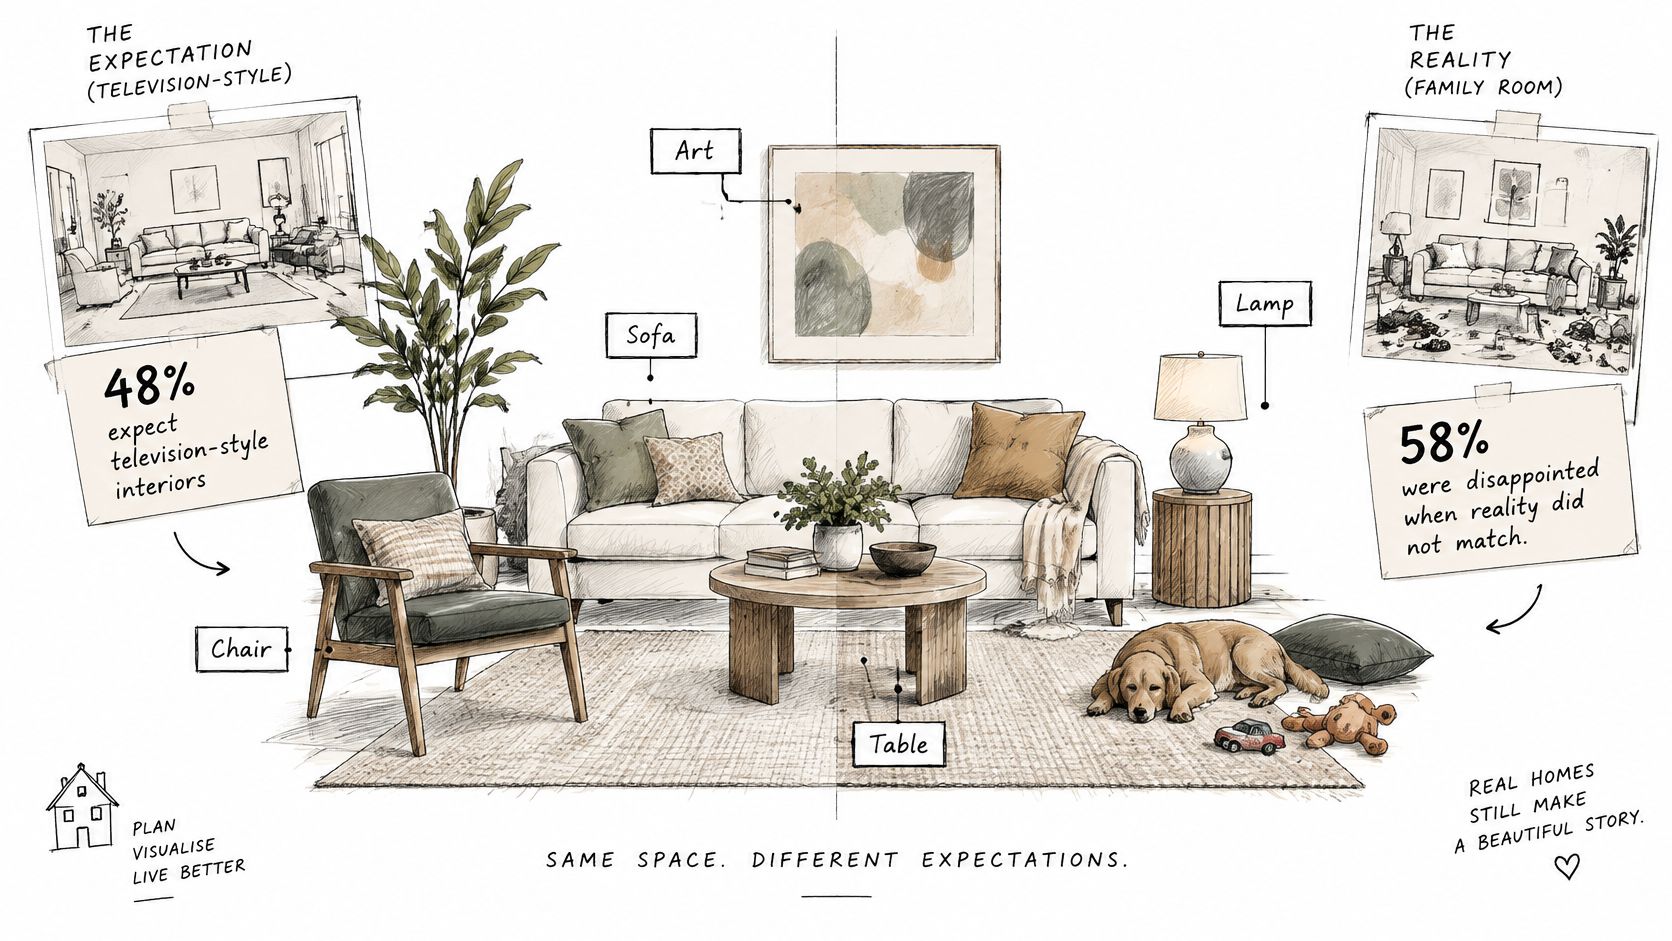
Television has set an awkward bar. In the National Association of REALTORS 2025 survey reported by Investopedia, 48% of agents said buyers expect homes to resemble professionally staged television interiors, while 58% said buyers were disappointed when reality did not match those portrayals.
Chasing that polished, nobody-lives-here look is the trap. A room staged for plausible daily use reads as more trustworthy. Pick the scenario that matches your likely buyer or occupant, then let it dictate layout.
- Young family: Keep a clear floor zone for children and choose a low, durable coffee table with no sharp glass edge.
- Downsizer: Use smaller scale pieces, one main seating group, and an unobstructed path to the kitchen.
- Renter: Stick to freestanding, removable pieces, nothing that needs fixings in walls or floors.
- Work-from-home occupant: Carve out a reading or desk corner with its own task light, separate from the TV seat.
- Accessible-living user: Widen walkways, use standard-height seating that's easy to rise from, and keep low tables out of the path.
Test Two or Three Scenarios Cheaply
Stage two or three options against the same empty photo before you spend anything. Keep walls and windows fixed, check every distance against your clearances, then score each version on ease of imagining living there, perceived spaciousness and visual coherence.
That's where virtual staging earns its keep. Virtual Staging furnishes and stages a photo of an empty room, keeping the walls and windows where they are. If you start from a plan, room boundaries and proportions of the uploaded floor plan stay exactly as drawn, so you can verify dimensions before purchase.
Don't stage all five scenarios. Measure the room, choose one scenario, and stage one version first. If it fails the clearances, it's out, however pretty it looks.
Place Furniture and Balance Visual Weight
Furniture placement is a sequence, not a shove-everything-in exercise. I'd work through these seven steps in order, because each one exposes mistakes the next step can't fix.
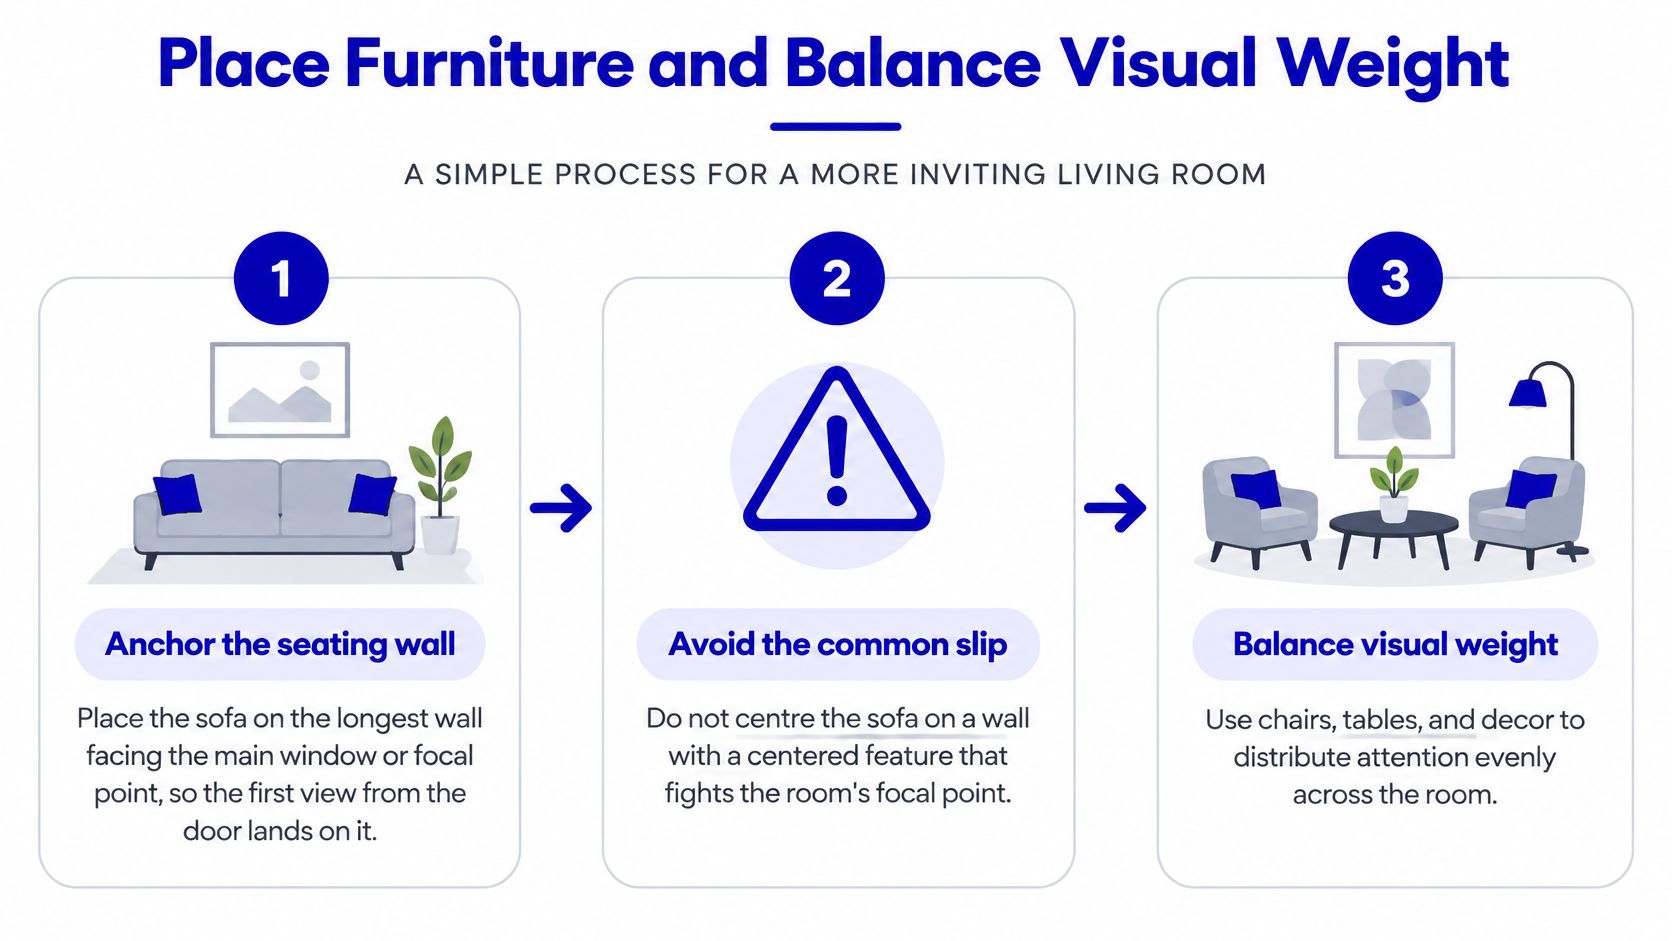
Anchor the seating wall. Place the sofa on the longest wall facing the main window or focal point, so the first view from the door lands on it. The common slip is centring the sofa on a wall with a door, which blocks the path and forces everyone to walk around the arm.
Float the rug under the front legs. The front legs of the sofa and chairs should sit on the rug, with at least 20 cm (8 in) of floor visible on each side. A rug that's too small makes seating look like it's floating in separate islands, and the room reads smaller than it is.
Set the coffee table by reach. Keep it 40 to 45 cm (16 to 18 in) from the sofa, level with or just below the seat. Don't oversize it against the sofa length. If guests can't pass without turning sideways, the table is too big, whatever the showroom said.
Angle armchairs into conversation. Place chairs at a 2.0 to 2.5 m conversation distance, angled toward the sofa, not pinned against the wall. Chairs facing straight ahead in a row make visitors choose between the TV and each other.
Give every seat a side table. A table within arm reach, roughly matching arm height, makes a seat usable. One shared table leaves the far seat as decoration. People notice when there's nowhere to put a drink.
Make the TV or fireplace the second focal point. Position it after the seating group is set, then check the viewing distance from the sofa with a tape. Don't let a media wall drag the sofa so far back that conversation dies.
Walk it and sit in every seat. Come in from the entrance, cross to the windows, and sit everywhere. Check sightlines, knee room and whether you can reach a table without stretching. If you bump anything, the buyer will too.
Balance Weight Before You Add Anything
Visual weight is about mass and darkness, not just size. A dark sofa or large cabinet on one side needs one or two lighter counterweights opposite, perhaps pale chairs, a light rug edge or an open shelving unit. Without that counterweight, the room tips visually toward the heavy corner.
Asymmetry suits most living rooms because doors and windows rarely sit symmetrically. Save strict symmetry for formal rooms with a central fireplace, where pairs either side look intentional rather than forced.
Keep about 30% of the floor open. Rooms with furniture pushed to the perimeter look like waiting rooms, and the empty middle helps nobody. Pulling the seating group into a tighter cluster usually makes the room feel larger, not smaller, because the use becomes obvious.
Practical rule: If the room feels unbalanced, move the heaviest item first. Adding small decor to fix a weight problem only adds clutter.
Mistakes That Quietly Ruin Scale
Watch for a sofa under 2 m long on a 4 m wall, which leaves stranded gaps at both ends. A sideboard blocking a window cuts light and reads as a storage problem. Too many cushions hide the seat, and the sofa stops looking sittable. Furniture scaled for a larger room is the costliest error, because every clearance fails at once.
Be honest about what staging can prove. According to Florida Realtors reporting on NAR's 2023 profile, 81% of buyers' agents said staging made it easier to visualize a home as a future residence, while only 20% said staging increased the dollar value offered by 1% to 5% relative to similar unstaged homes.
That's a perception tool, not a guaranteed premium. Agent-reported willingness to pay isn't a verified transaction price. Preserve structural truth, disclose virtual furnishing in marketing, and validate dimensions against plans or on-site measurements before you order anything.
If it still feels off after styling, don't add. Move the heaviest item, recheck the walkway, and sit down again.
Styling Layers That Make the Room Feel Lived In
Styling works when it follows counts, not impulse buys. Start with textiles, because they're the cheapest way to warm a hard room and the easiest layer to overdo.
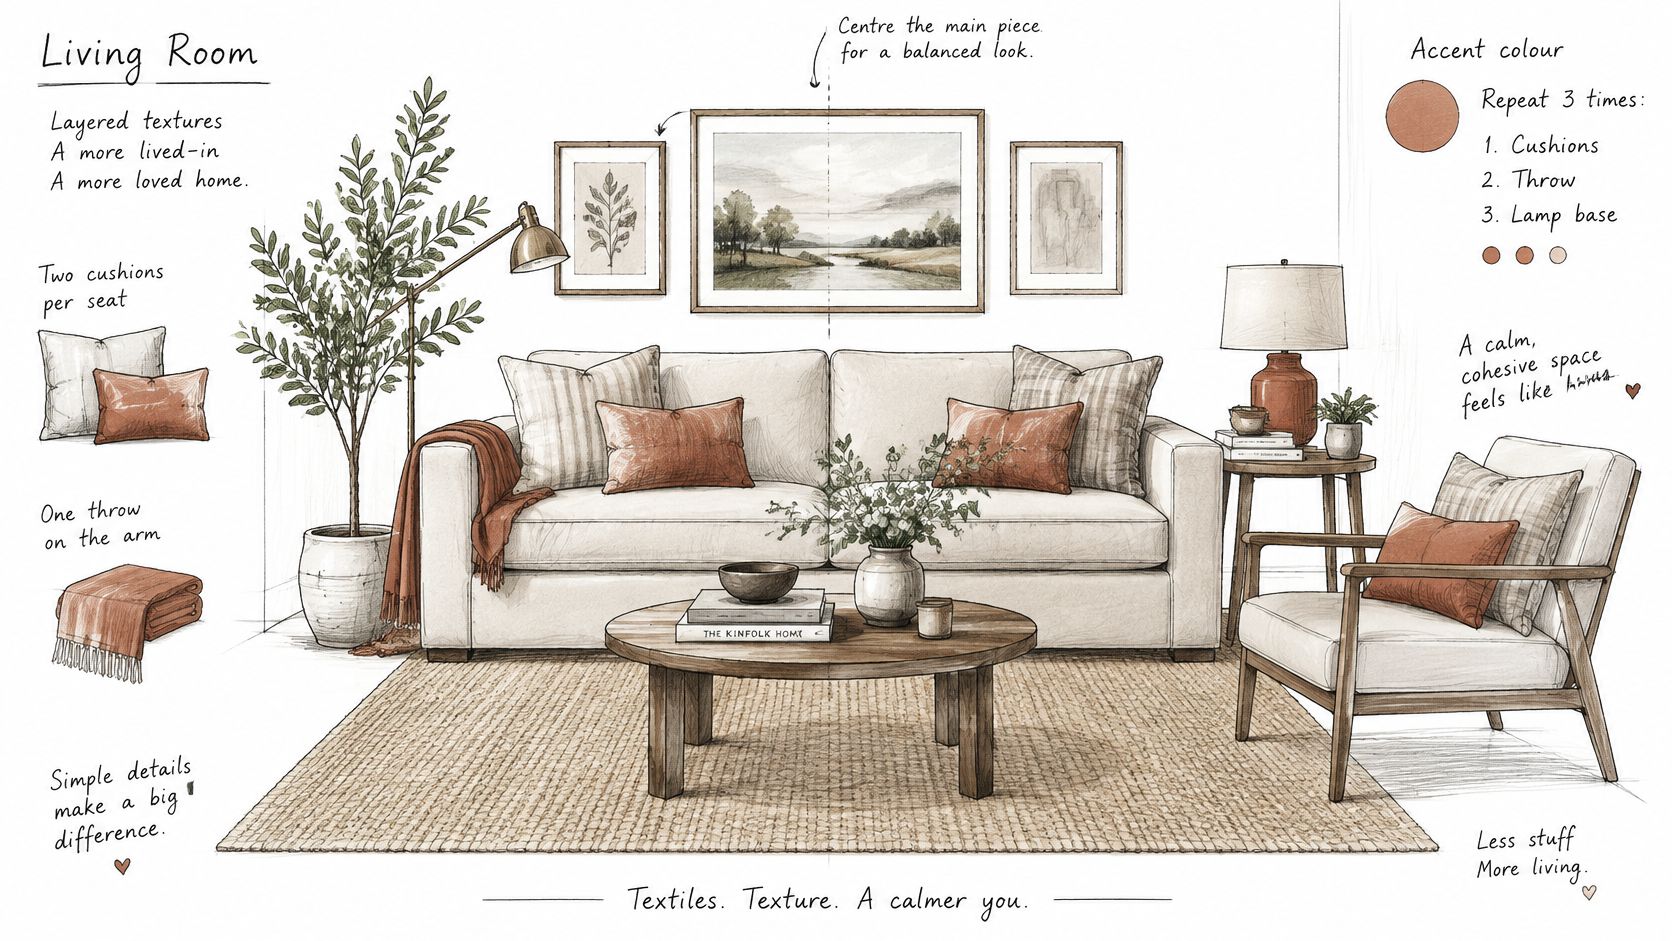
Use two cushions per seat in two sizes, one larger square behind a smaller rectangle. Fold one throw on the sofa arm, not draped across the whole back. Repeat one colour three times around the room, in a cushion, a book spine and one small object, so the eye travels instead of stopping at a single loud accent.
Art, Greenery and Small Objects
Hang the centre of the main art piece at about 150 cm (57 in) from the floor. Art hung to clear standing eye level floats above seated conversation and disconnects from the sofa below it. Keep frames in one or two finishes. Three finishes in one room reads as leftovers.
Add greenery in two sizes. A large plant in a corner anchors empty height and softens a hard junction between walls. A small plant on a side table or shelf repeats the life at seated level without turning the room into a conservatory.
Books work best stacked in threes, some spines closed, with one object on top. On the coffee table, corral a bowl or candle on a tray. Loose small objects scattered across a surface look like clutter in photos even when they're tidy in person.
Depersonalize, but Leave One Trace
Remove family photos, collections and bold personal decor. Buyers shouldn't have to work past your holiday shelf to imagine their own evenings. But don't sterilize the room completely.
Keep one object that suggests a real person lives there, a well-used basket, a mug by a chair, reading glasses on a closed book. That single trace separates lived-in from showroom.
In a small room, use fewer objects at larger scale. Ten tiny ornaments fragment a small surface. Three confident pieces don't.
In open-plan spaces, define the living zone with the rug and one lamp so seating doesn't visually merge with the kitchen. The zone needs an edge, or buyers can't tell where living ends and cooking begins.
Finish with a ruthless check. Remove one item from each surface and step back. If the room looks calmer, it stays out.
Lighting Layers for Showings at Any Hour
A living room lit by one ceiling fixture looks flat in photos and gloomy at an evening viewing. Faces go shadowy, corners disappear, and the ceiling light casts the kind of glare that makes people want to leave. Layers fix that, because each one does a different job.
Lighting layers for a staged living room
| Layer | Example fixtures | Job in the room |
|---|---|---|
| Ambient | Ceiling or flush-mount fixture | Even base light across the room |
| Task | Floor lamp, reading lamp | Light at each seat and reading corner |
| Accent | Picture light, wall washer | Highlights art and shelving |
| Daylight fill | Sheer curtains, open blinds | Brightens the room for daytime photos and viewings |
Colour Temperature and Lamp Placement
Keep every artificial layer at 2700 to 3000 K. That warm range flatters skin and wood and photographs consistently. Don't mix warm and cool bulbs in one room. One blue-white bulb makes the others look dirty and the room look mismatched.
Follow the rule of one lamp near each seat. A chair without light is a chair nobody will choose after dark. Check each shade from seated height, because a bare bulb visible when you sit down produces glare exactly where a buyer will notice it.
Switch on every light before a showing, including picture lights, even at midday. You're not lighting for your electricity bill. You're removing dark corners from the buyer's first scan.
A Worked Example You Can Copy
Take a 4 m by 5 m living room with one ceiling fixture. Add two floor lamps beside the sofa, one picture light over the sideboard, and sheer curtains with blinds open. That's at least four light sources, and each seat now has light, the art has focus, and daylight fills without harsh contrast.
Count your sources before any showing. If you can't reach four, add a lamp before you change anything else.
For north-facing or naturally dark rooms, use the brighter end of the warm range and add a fixture rather than forcing higher wattage into one spot. One overbright lamp creates a hotspot and deeper shadows around it. Two moderate lamps spread the light and make the room feel calm.
Upload a photo of your empty or partly furnished living room to mnml.ai and use Virtual Staging to test your chosen scenario with the walls, windows and proportions kept exactly as they are. You'll see whether the clearances, furniture scale and lighting work before you buy or move a thing, which is the cheapest point to change your mind.